photo shop_zps4e91b29b.jpg  photo about_zpsab9889c9.jpg  photo contact_zpsf03ef059.jpg  photo Untitled-2_zps43e03738.jpg
Showing posts with label guest post. Show all posts

Wednesday, 16 April 2014

How to exercise Ice King style by Confessions of a Book Pimp

Hi guys! I have a fantastic guest post today bought to you by Joie from Confessions of a Book Pimp. I first approached Joie to do a guest post on the blog when I noticed her amazing fitness cosplay posts! She has done many of my fav characters, such as Anna & Elsa from Frozen and Princess Bubblegum. It sounds like she has many more interesting cosplay ideas to share so be sure to check out her blog for updates!


Hi! I'm Joie Fatale and I blog over at Confessions of a Book Pimp. I'm a lover of books--especially Fantasy, Sci-Fi and Comics--and I have quite a few fandoms. For 2014 I'm trying to get in the habit of eating healthy and working out. One of the ways I wanted to keep myself motivated is to keep my goal of wanting to cosplay, a part of the actual working out bit! And thus, Workout Cosplays were born! 

I picked the pieces for this based on the Ice King (I've also done posts on LSP, and, Princess Bubble Gum). I like the Ice King for his eccentricity, and though I dislike his creepy factor **shivers** I like his determination, and I hope to harness that into my own working out!


Items featured:

Sunday, 24 February 2013

Red Dotty Nail Tutorial - A Guest Post from Artsy Angel


I have a very special guest post for you all today from one of my sponsors and also one of my fav bloggers Artsy Angel. Her blog is full of loads of colourful things, art and inspiration. I love love love the way she paints her nails, so I asked her to do a simple nail tutorial post for me based on her Blue on Blue nail art. I hope you all enjoy it!

What you'll need:
- 3 nail polishes. A main colour, a second colour and a colour for the middle dots. (I used a red, pink and an orange-y-pink,)
- a dotting tool or something to make the dots with (like a toothpick)
- Tape or nail stickers (this is the one I used)
- top coat

Tip: Examples of other colour combos; dark purple, light purple and a purple-e-pink for the middle. Green, blue and a teal for the middle. Orange, yellow and a peachy or creamy colour for the middle.
1. Paint your nails your main (red) colour.
Wait for your nails to fully dry before going to the next step.
2. Place your nail stickers or tape, around the half way mark on your nail. Paint them your second (pink) colour. Peel off the sticker or tape slowly.
Here are my nails after I took off my stickers. You'll see they are kind of messy and that is okay! The dots are going to hide any mistakes I make anyways so this part does not have to be perfect.
3. Take your time and start your first row of dots using your second (pink) colour. You want these dots to be above the line, make sure you are leaving enough room for the other rows of dots. 
If you're worried, do your middle (step 4) first and come back to this step after.
Tip: Make sure your nails are somewhat dry before starting your dots. You could even put on a layer of your favourite top coat to be safe.
4. Add your middle layer of dots using your third (orange-y-pink) colour. Make sure your dots are right on the line.
5. Add your last layer of dots using your main (red) colour. Wait for your dots to fully dry or you'll smudge your design. If you notice your dots are kind of big (theres a bump), give them extra time to dry.

Tip: To help speed up your dry time, place your finger tips n a bowl of really cold water or run them under the tap for a minute or two.

 
6. Finish off with a nice layer of your favourite top coat and you're done! :]


Monday, 4 February 2013

Little Mermaid Nail Art - A guest post for Of Corgis & Cocktails


A few weeks ago Katherine from Of Corgis & Cocktails asked me to do a Disney themed guest post for her. I'm pretty obsessed with my new I Love NP Little Mermaid nail varnish, so I thought it would be awesome to do a Mermaid themed nail varnish tutorial!

Saturday, 15 December 2012

DIY Embroidered Christmas Cards - A guest post from Barnicles


Hi I'm Barny or Barnicles. I fell in love with Chantal's unique style and skills and her blog Pony Chops. It's a pleasure to sponsor this blog and be writing a guest post here! During the week I work as an accounts assistant. I have always been creative, resulting in some questionable results - at thirteen I didn't understand darts properly. My mum also has a collection of crochet or knitted hats and gloves which don't fit properly. I usually made the pattern up while I was working on something. Now I have access to so many more patterns and tools, pinterest being an important one, but not enough time to make! I admire my motivation back then, I was fearless and would try to make anything. I'm not a writer but I am good at being creative - crochet, tatting, knitting, weaving, painting, sewing, crafting, music, drama, photography etc. Sometimes having such a variety of interests it is hard to specialise in one, so none of them end up with the necessary time. 

How to design and make your own cross stitch Christmas cards by Barnicles.


I'm very excited to be sharing this tutorial with you today, I'll admit this is one of my first tutorials so be kind and let me know there is anything that is unclear. You can leave a comment or email me at Barnsworthington (at) gmail (dot) com.

I'm going to be talking you through how to design and make your own cross-stitch cards. I love embroidery so much. I'm hoping you'll be able to take this tutorial and do what you want with it. These are just some hints and tips to help you. I would love to see what you come up with, so please leave a comment with a link if you try it. 


Supplies


- Sewing thread/embroidery thread/wool in colours of your choice
- Embroidery needle or needle suitable to the size of your thread or wool
- Card in a colour of your choosing. (I have used stationary card folders in the past, so see what you have available)
- Pen or pencil
- Square paper or lined paper
- Masking tape or painters tape
- Paper scissors
- Envelopes suitable for the size of card you choose
- Camera to take a photo of your finished artwork before you send it to someone special :)


Making the basic cards

You could use other birthday or christmas cards as a measurement for your cards. They can be any shape you want. You need at least an inch at the top or side so you don't break the fold, if you want a folding card that is. You could use this tutorial to embroider a star or circular shaped piece of card, then cover the back and add a string to make an ornament. Every year my aunt sends a handmade textiles christmas ornament with a note written on it.

A good tip is to use your envelope as a guide. I found some awesome colourful envelopes in Asda today for £1. The metallic sharpies in silver, gold and bronze also tempted me. It appears for today at least I maintain some self restraint. 


Design
1. Artistic license time! Using paper sketch out some ideas - a Christmas tree, bauble, angel, present, star, etc. Unless you are good at pixel design keep it simple. Think about sizing in relation to your card size. My templates are shown below, you can save these and print them out if you want to skip to making. 
Sketch out your final design roughly on the square paper, this is going to be your template. If you only have lined paper it is better to take a ruler, measure the lines and add your own grid pattern using dashes where the cross sections appear. You can do it by eye but your design might suffer ;) 


2. Using X's fill in your design with different pens to show different colours. Your inner designer may have to make a few choices but this pixel affect is what we need, these charts can be used for crochet, knitting, or cross-stitch designs on aida or fabric. You can use this same pattern to create many different combinations. This method uses trial and error, you might want to use pencil so you can rub out X if you change your mind. I suggest you play with a variety of design's and then choose your favorites. 

3. Decide if you want to use natural colours, or go fun and crazy! Think of a variety of colour combinations to add variation to your cards. It's up to you if you want to create a few of the same design or make each one different.  Remember you can use silver or gold thread to add extra sparkle and highlights.


Making

1. Creating your cross-stitch base. 
Cut out your chart leaving a few squares border and use masking tape or painters tape to attach the design to the front of your card, ensuring the fold is on the left. (I learnt this lesson as a child - my cards were unusual!) I find poking through from front to back gives a nicer effect but if you want to draw your design on the back you can poke from the back forward. 


 Use your needle to poke holes through just the first layer of card, take care your not poking yourself. You can open the card to ensure the back doesn't get punctured. Take care to poke through all the cross-sections of your design you want filled in.  You should use the smallest needle possible for the material you are using, but often it is necessary to use a bigger needle for wool. To poke the holes you need a sharp needle to make a clean hole the same size as the material. I found a great packet of embroidery needles in various sizes at my local fabric shop. These are a sound investment, a needle for every situation.  


2.  What material to use? 
This project looks good with sewing thread, embroidery thread, any type of wool. Each of these will create a different effect and so it's up to you, the designer to choose! Most of the examples shown are made with knitting machine cone wool, which is similar thickness to embroidery thread. I just use what is available. 

3. Starting to stitch.
Cut a length of your main colour - hoping you've decided on your colour and design choices by now. Thread your needle, you can tie a knot in the end or leave a tail to tie to the end tail or weave in later. Aim for the corner point and decide which way you are going to slant your stitches. This is a great tutorial on starting a cross stitch row. If you realise you have missed some holes you can easily use your template and needle to add these in. Work as logically as you can across your design.  


4. Adding the X
Once you have finished all the slants in one direction with one colour you can work backwards crossing all your X's or T's... so to speak. Leave a tail and you can tie this with the starting tail or weave it in to your stitches with a needle. Finish all your different colours, till you complete your design. 

6 . Finishing off the back of your embroidery
Loose threads should be secured - tied to another loose thread or woven in using a needle. Excess thread can be trimmed to make the back as tidy as possible. If this is your first try I wouldn't worry about it being messy, just cover it. 

When choosing whether to cover the back you should use your best judgement and creative flair. Last year I choose not to cover the black of my designs, showing their handmade nature. On other embroidery projects I have covered the multitude of sins on the back. It really comes down to how many different threads you have used or different colours and how you want your card to look.

To cover the back of your card, cut a piece of card bigger than your design but smaller than the card size. Use glue around the edges of the cut piece and cover your loose ends.

Adding your maker stamp (optional)


On the back of each card I make I like to add a maker stamp. This is personal to you. Sometimes I write "(c) Barnicles", other times it is more specific "Handmade for **** by Barnicles" or Made with love" (because I'm a hippy really).


Take a photo of your lovely artwork +  finally send your card to loved one!

Below are some examples of cards to inspire you and show you what is possible. I challenge you to make cards in festive colours, but also experiment, pastels are for Christmas too. Who says you have to be traditional? 


Have fun crafting! 

Barnicles 


Saturday, 3 November 2012

Guest Post: Modern Girl Blitz

Hello lovelies! Today I have a really exciting guest post for you from Midge at Modern Girl Blitz. Midge is a very talented illustrator and zine maker. I love her work and the amount of thought that must go into it. Please take some time to check out her wonderful Etsy shop and blog.


Hi there! My name is Midge and I’m a zinester/artists who loves to make quirky feminist art and crafts! In other words, my job is pretty awesome. I got started making zines when I actually was studying them for my thesis in graphic design school. When my project was over, I missed it dearly, so I decided it would make some sort of continuation of it. So in my mind, my thesis is on-going! My zines are centered around feminist views and issues, but get down to the real nitty gritty of certain topics. I talk about everyday things and examine them from a feminist perspective (like things from tattoos to every day social situations to speaking out). Making zines as a hobby combined with not being able to find a design job in the “real world” after college resulted into creating what I like to call my quirky crafty feminist shop, Modern Girl Blitz! I’m hoping it will keep on evolving and that I can rode this wave for much longer, making my arts and crafts for feminism.


Most of my shop items center around a strong sense of feminist pride and self confidence, which are both things that I think we need more than ever. I like to think that a lot of my art and writing in my zines cater to many coming of age feminists, and not so young feminists as well. But I do find a lot of younger folks liking my zines and art I guess as their gate way drug to feminism, if you will! Which rules. This idea inspired me to come up with my little slogan “feminism is cool” Cause it is! Come see what I’m all about at moderngirlblitz.etsy.com and at my blog at moderngirlblitz.blogspot.com

Love,
Midge


Wednesday, 31 October 2012

Happy Halloween!

Happy Halloween everyone!! I'll be spending today painting and I'm watching Silent Hill tonight. What are you Halloween plans?

Just to get you into the Halloween spirit, why don't you try making one of my delicious & disgusting swamp smoothies? (Yes I used tapioca pearls in this recipe AGAIN. I'm still obsessed with them.) I posted the recipe on Modern Girl Blitz, thank you to the lovely Midge for letting me guest post on her blog!


Sunday, 21 October 2012

Guest Post: DIY Polar Bear Diorama


Lush Prints were kind enough to send me this beautiful tutorial on making a  little arctic diorama. I think it's adorable and would make such a special gift for someone!

Don't forget to enter my Lush Prints Giveaway. You could win yourself an adorable personalised Polar Bear stamp!!


Monday, 15 October 2012

Nail tutorial guest post & the winner is

Well, the Young Explorer Stuff Giveaway has finished and I'm pleased to announce the winner is Katherine (creepmouse)! Well done Katherine!! I hope you love your beautiful brooch from Young Explorer Stuff.

I also wanted to tell you guys that I've just done a guest post over at Grits & Moxie on how to paint Kawaii Candy Corn Nails. Go check it out and have a go!


Guest Post about Veganism: Jessie from My Mod Style

I'm so excited to introduce this post to you guys! I have wanted to include a post on Veganism for a while now as it's a big part of my life. So when Jessie from My Mod Style offered to do a guest post about being a Vegan I jumped at the chance. She has such a positive attitude and has a lot of great things to say! 

Thank you Jessie for this lovely post :)

Hello! My name is Jessie and I blog over at My Mod Style. My blog is a mixture of things really. I love to post about Interior Design, my life, fashion, nature and way too many other things to list. Hopefully you'll just stop by and check it out! When Chantal asked me to do a guest post for her blog I decided I wanted to do a post about being Vegan. I wanted to give my point of view on it because so many people just have opinions on it without really understanding it. I went Vegan this year and it's been 9 months now. I wanted to put some insight on being Vegan, why I decided to make the change and just simple tips and advise.

Vegan why
My husband and I were burned out on eating the same meals over and over. I dreaded going to the grocery store every week and buying 15 pounds of ground beef and a huge bag of chicken breasts. I hated touching meat and even looking at it. We were both raised to eat meat and never thought anything of it. It's just considered normal so it's what you eat. Since being Vegan isn't considered "normal" by many, sometimes it's hard to deal with the way people treat you or view you.

I am very petite and always wanted to make sure that I stayed at a healthy weight for my tiny size. I would work out and never see results and I find myself very frustrated!! One day my husband and I decided to watch a film called Forks Over Knives on Netflix. The film focuses on eating a plant based diet. You cut out all animal products completely. No meat, no eggs, no milk! Anything that is part of an animal at all. It also focuses on cutting out added oils, processed sugars and preservatives. Seems hard right? Well apparently it's not that hard because I've been doing it for 9 months! :)

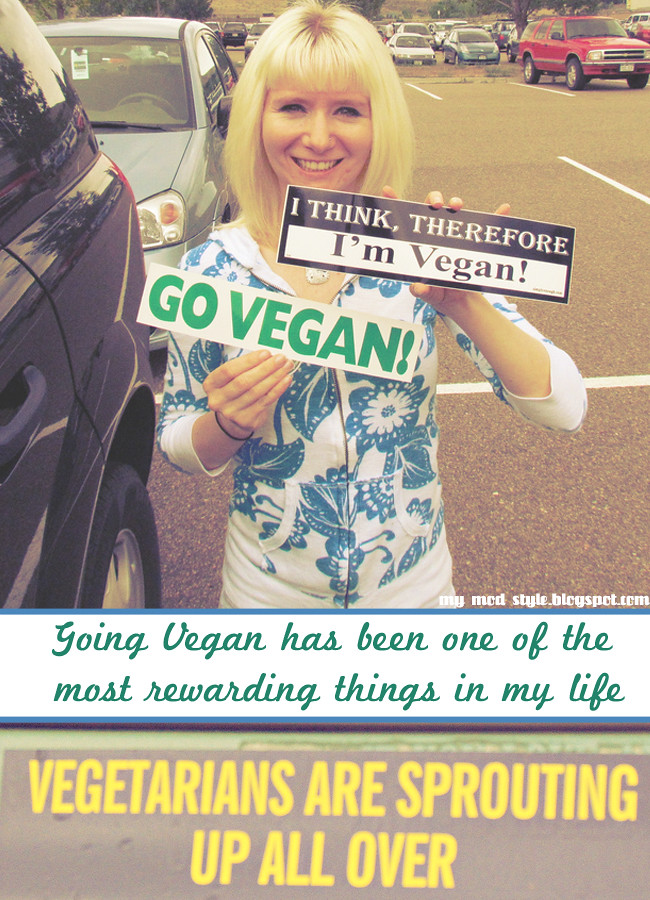
Photo of me at the Denver VegFest // Read the post HEREVegFest 7.8.2012
At the time I didn't really consider myself a Vegan. I just knew I was losing weight in all the "right places" or I guess you could say "my problem areas". My husband has gone from 168 pounds to currently at 137 pounds! (No, he's not a skeleton! He lost a lot of belly fat and in his face.) I really didn't want to call myself a Vegan at first because I knew how most people would react. They say such things like:
"Oh, you are one of those people!"
"You have to eat meat to get Protein!"
"Oh that's why you are so small! HAHAHA!"

I am not even going to type the things that guys say to my husband. I am sure you can imagine some of it.
If you don't eat meat, you aren't "manly". Some people are not judge mental and ask questions, but most are rude.

Vegan protein
If you are Vegan or decide to try becoming Vegan you will asked almost daily, "How do you get protein?" If you watch the Forks Over Knives movie you will learn a lot about all this so called protein that we are supposed to be getting from animals. Yes, it has protein....but is it healthy? My opinion is no. So my answer to people who ask me this is, "Everything I eat has protein in it." It saves the argument and it's the truth. As a Vegan you can get all kinds of protein shakes if you are worried you aren't getting everything your body needs. All the Vegan foods are loaded with protein. Not to mention both Almond and Soy Milk have twice the amount of calcium that dairy milk has. It also tastes AMAZING. My husband says the Vanilla Soy Milk tastes like ice cream. It pretty much does.

So what do I eat you may ask? Pretty much everything anyone does, just differently. We eat pizza, sloppy joes, tacos, burgers, spaghetti and many dishes that are way better then anything I had ever ate the first 30 years of my life! The key to being Vegan and not "falling off the wagon" when you first get started is good recipes!

Vegan Cookbooks

As you can see we use Vegetarian cookbooks also. We just adjust the recipes to the guidelines of our Vegan diet. Being Vegan is not as hard as everyone thinks it is. There are great products out there now a days to help you continue to eat ice creams, cookies and whatever else your heart desires. We use honey in our coffee now instead of sugar for example. On my blog I have added some of my favorite recipes that we eat. I highly recommend the Forks Over Knives cookbook and any of the Happy Herbivore ones. There are lots of great blogs out there with FREE recipes also! One of my favorites is Fat Free Vegan.

Most people go Vegan for the rights of animals or simply their love for animals. Well I'm right there with them now. At first it was just for my health. Over time though I educated myself on environmental issues more and just the treatment of animals. I've always loved animals, so going Vegan was very fitting for me.
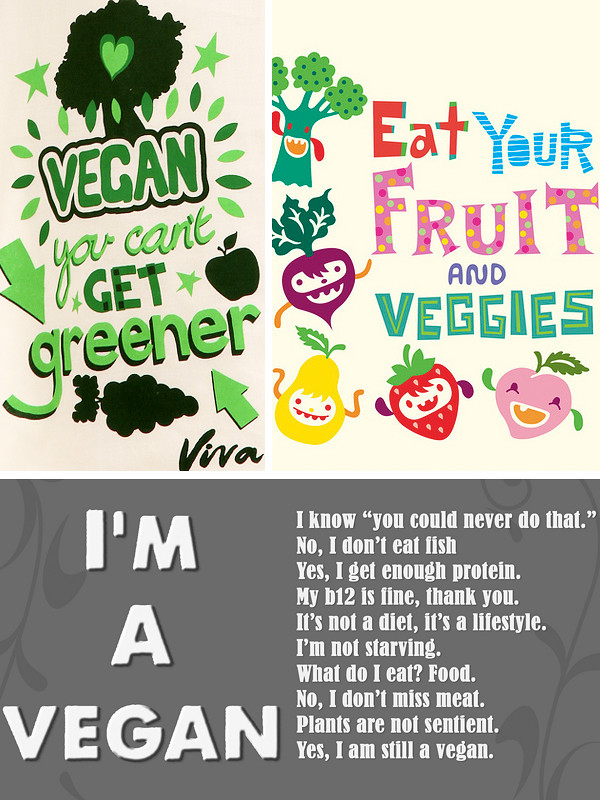
Vegan Posters

I don't view cows as a hamburger anymore. When I see a cow now I feel sorry for it. I see a living breathing creature. I wish I would of stopped eating meat years ago. I have such compassion towards all living beings and our planet now. It's been life changing and defiantly eye opening for me. It's changed me forever and honestly I love the new me! I used to be so scared to post anything on my blog about saving Whales or recycling. Scared I may offend people or they wouldn't read my blog because I wanted to save animals and the planet. Now I just hope that I can inspire one person to make the change the way I did.

When I met Peter Hammarstedt from Whale Wars he told me that we all have a voice and we need to use it. I couldn't live with myself if I didn't speak up about these things! If you just read all this THANK YOU very much and especially thanks to Chantal for having me on her blog! :)


Saturday, 29 September 2012

Guest Post at My Mod Style

The lovely Jessie at My Mod Style very kindly asked me to do a guest post about my shoes. Hop on over and check out her other posts too! She has some great interior decoration ideas!


Tuesday, 14 August 2012

Alex in Australia: A trip to Cairns

Last week I returned from a great trip in the very north east of Australia. The small town of Cairns was our base for the next few days as we travelled around the countryside and oceans of Queensland. 


Cairns is a tourist hotspot for backpackers and Australians alike who look to see the Great Barrier Reef and rainforest's that surround it. Like a lot of Australia Cairns has not evolved naturally as a town. The roads are gridded and the buildings are mainly one storey 70s/80s shops and clubs. More like a lads holiday destination than an avenue to paradise. We therefore hired a car and over 4 days drove around 660km through the most beautiful scenery in the world. 
 
Day One/ 
We largely spent the day around Cairns, buying bits and bobs - in my case camera parts - for the next few days of travelling. We booked a day trip to the reef and spent some time at the amazing harbour of Cairns. This is a generalising statement but Australia's most beautiful areas are largely untouched by humans. Cairns' surrounding hills and water are fantastic...the town itself, not so.


Day Two 
We took to the water on the 'Reef Magic' boat to a pontoon in the middle of the ocean residing next to.. I believe Moore Reef, a small section of the Great Barrier Reef. It was a surreal experience to be eating a buffet lunch miles from solid ground! Anyway snorkelling and semi-submersible boats were at our disposal and I managed to get a few photos along the way. The water is literally teeming with fish, coral and life. Of course this was only a small section...but the destruction you hear of couldn't be seen here. I wish I had bought a waterproof case for my camera to make the most of the amazing coral and fish but sadly I didn't have a spare $1000.


Day Three
Our first day in the hire car took us up to the oldest rain forests in the world (according to the hire company). We drove along the Captain Cook highway through miles of farmland and past miles of beach (stopping off at a few) before finally reaching our destination Cape Tribulation. 


"Lieutenant James Cook on 10 June 1770 (log date) after his ship hit a reef as it passed over it, north east of the cape, at 6pm. This made Cook pull away from the coast, looking for deeper water. At 10.30pm, the Endeavour hit a reef almost sinking Cook's ship, on what is now named Endeavour Reef. Cook recorded "...the north point was named Cape Tribulation because here began all our troubles"


Anyway we wandered around there watching out for the apparent dangers of crocodiles and then made our way back to Cairns. We stopped off at the magnificent Daintree Ice Cream Company for some very 'local' flavours. Wattle seed, yellow sapote, blueberry and pineapple. All grown on the premises. Our last stop before Cairns was Port Douglas for some food whilst admiring the harbour sunset.


Day Four
Today we drove from Cairns south to visit Paronella Park. The park was the creation of a rich sugar cane plantation owner who decided to build a castle and theme park in his back garden. The castle is built from concrete, local stone and steel from railway tracks. A long drive that wasn't to me exactly worth it. I think to an English person the 80 year old castle is more of a personal project than a tourist attraction, and in general was a bit of a wreck. Anyway on we drove high up into the hills to visit Millaa Millaa falls and on to the town of Yungaburra to see the sun set over Lake Tinaroo. At one point (according to Google Earth) we reached an elevation of 900m above sea level. Our little hire car struggled up those hills! 


That concluded our final day of adventures and after a total of 9 hours driving over 4 days we headed back to Cairns for some food and rest. 

It was an amazing holiday that I won't forget for a while. The sheer scale of Australia is mind blowing, after all that driving we cockily checked the map to see how much ground we had covered...as you can see below it was minuscule! Like I said before oz is an amazing place, hills, beaches, rivers, waterfalls...wild turkeys, you can't beat it. But admittedly it is sometimes let down by the poor choice of architecture with housing and shops etc...my Dad likened it to an alien dropping a 4 bed detached house down from the heavens into a field. He's not wrong.


Anyway it has spurred me on to see more of the oz when time and money permits...I will keep y'all posted.