


photo shop_zps4e91b29b.jpg  photo about_zpsab9889c9.jpg  photo contact_zpsf03ef059.jpg  photo Untitled-2_zps43e03738.jpg
Showing posts with label baking. Show all posts

Thursday, 25 October 2012

Etsy Shop Feature: Distle Funk

Distle Funk specialise in adorable ceramic cookie stamps. These cookie stamps can not only be used for decorating cookies, they can be used for crafts and all sorts. I can just imagine how beautiful these patterns will look on a freshly baked, shortbread cookie.

 "Cookie Stamps have become a much-loved tradition in countless kitchens around the world. These adorable, handcrafted clay stamps follow the Scandinavian and Pennsylvania Dutch custom of decorating cookies with designs made from carved stamps. It was discovered not long after that cookie stamps were also great for stamping just about anything- clay, paper, wax, chocolate, fondant."



 Which one is your favourite? And what would you use it for? I'd like the labrador one, I'd use it to make little chocolate labrador cake decorations.


Saturday, 13 October 2012

Chocolate, Raspberry & Coconut Cake


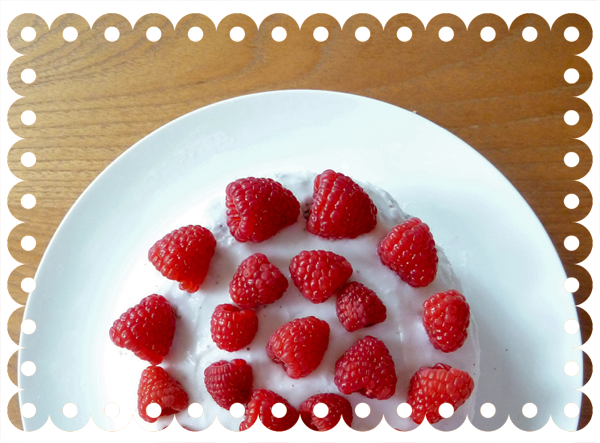
Being a chocolate lover, one of my favourite things to bake is chocolate fudge cake. You really can't beat a moist, rich, chocolatey cake covered in buttercream. This recipe is based on a traditional chocolate fudge cake recipe, but i've twisted it and added creamy coconut and fresh, tart raspberries to compliment the rich and indulgent chocolate cake.

Sponge Ingredients: 
1 1/2 cups all purpose flour
1 cup unbleached cane caster sugar
1/4 cup cocoa powder
1 tsp baking soda
1/2 tsp salt
1/3 cup vegetable oil
1 tsp vanilla extract
1 tsp white vinegar
1/2 cup thick coconut cream
1/2 cup coconut milk

Frosting Ingredients:
5 cups icing sugar
1 cup thick coconut cream

raspberries to decorate


Sponge Method:

1. Preheat the oven to 350F (175C). Grease or line your cake tin. I used a deep 8 inch tin but anything around that size will do.

2. Sift all of the dry ingredients into a large mixing bowl. Mix in all of the wet ingredients until it is all completely mixed.

3. Pour into the prepared tin and bake for 45 mins (This will be less for fan ovens so check it after about 35 mins. To tell if the cake is done put a sharp object into the middle of the cake, if it comes out dry the cake is done.)


For the frosting & decorating:

Mix all of the icing sugar and coconut cream into a thick icing consistency.

Once the cake is cooled, if you want a double layered cake cut in half through the middle. Ice in between the layers and then ice the complete cake. Decorate the top with fresh raspberries.


Thursday, 4 October 2012

Etsy Shop Feature: Bunny With a Tool Belt

I got so excited when I discovered this shop. Not only does it have a super rad name: Bunny With a Tool Belt, but it sells amazing and creative cake toppers and adorable little sculptures. This shop in an absolute feast for your eyes (I had trouble only picking a few photos, I wanted to show you them all).

Bunny With a Tool Belt was founded by Hilary, who has been making a living from her creativity since 1989. Part of Hilary's reason to choose the etsy shop name came from her fondness to appear in public in a bunny suit.


Go check out the Bunny with a Toolbelt facebook page for more creative goodness.
Which is your favourite sculpture/cake topper? Mine has to be the sausage dog!

Saturday, 15 September 2012

Food adventures with Miss Ginge

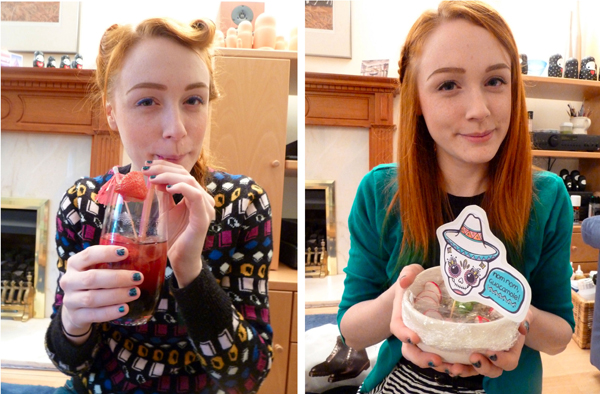
This past week I've been fortunate to see my bestie Ginge (from Chopstitch) a few times. Ginge is a super creative person and she loves baking just as much as I do. So our time together is often spent drawing, eating, baking, ranting about art or watching britains next top dog model on the telly.


At the weekend I had a little get together and Ginge bought some food, that she had made adorable labels for (this is probably the cutest idea for party food ever!).


She bought me some little pressies and made me a get well card because I haven't been so well lately. How cute is the dinosaur with crutches?? She's such a talented lady.


Sunday, 15 July 2012

Vegan Chocolate Chip Flaxseed Cookies

These are probably my most favourite cookies to make ever. Even including cookie recipes from before I went vegan. they are gooey in the middle and crunchy on the outside. Exactly how a cookie should be.

This recipe was inspired by Oh She Glows's vegan cookies recipe. I added some extras to make them extra healthy and just as yummy.

You can find the recipe for the pink cupcakes in this photo here.


Ingredients:
  • 3tbsp ground flaxseed
  • 1/2 cup margarine
  • 1/2 cup packed brown sugar
  • 1/2 cup agave nectar or cane sugar
  • 1 egg replacer 
  • 1 tsp vanilla extract
  • 1/2 tsp salt
  • 1/2 tsp baking soda
  • 1/2 cup wholewheat flour
  • 3/4 cup all purpose flour
  • 1 cup vegan/dark chocolate chips
  1. Preheat the oven to 350 (175C) and line some baking trays with greaseproof paper.
  2. In a seperate cup mix the egg replacer according to instructions on the box.
  3. Mix all of the ingredients together thoroughly, adding the made up egg replacer.
  4. Roll into little dough balls and place on the baking sheets.
  5. Bake for 10-12 mins. 
  6. Allow to cool a little before serving.
I always make a ton of this cookie dough then freeze it. It freezes really well, just defrost fully before baking.

Sunday, 8 July 2012

Vegan Berry Cupcakes

This recipe is a spin on Bob's red mill's strawberry cupcakes recipe. I've changed a few things around and added some yummy, tangy raspberry frosting instead! In this picture I made mini cupcakes but the recipe should make 9 large cupcakes or more normal sized ones.


Ingredients (cake mix):
  • 1 cup white flour
  • 1/2 cup wholemeal flour
  • 1tsp baking soda
  • 1/2 cup natural cane sugar
  • 1/4 cup agave nectar
  • 1/2 cup soya/vegetable margarine
  • 1 cup soy/rice milk
  • 1 tbsp vinegar
  • 3/4 cup mashed strawberries
  • 1tsp vanilla extract
  1. Preheat the oven to 350° (175C). Measure the flour, baking soda and salt into a bowl. 
  2. In a seperate large bowl, cream together the margarine, agave and sugar until thoroughly mixed. 
  3. Gradually add the soymilk, vinegar and vanilla extract while mixing.
  4. Mix in the flour mixture and the mashed strawberries.
  5. Pour into cupcake cases and bake for 12-15 mins. Cupcakes are ready when you can stick a fork in them and the fork comes out clean.
  6. Leave to cool before frosting them.
Frosting Ingredients:

  • 1/2 cup soya margarine
  • 1 3/4 cups icing sugar
  • 1 tsp vanilla extract
  • 1/2 cup raspberry jam (seedless)
  • Red food colouring (optional), if you can't find vegan food colouring try using beetroot paste.
Mix all ingredients together thoroughly and add red food colouring to get the desired colour. If the mixture is too thin add more icing sugar. Put in the fridge for 10-30 before icing the cakes.

Sunday, 3 June 2012

Vegan Chocolate Orange Shortbread Cookies


I made these cookies on friday for my mum and her friends, and I have to say, I'm kind of impressed with how they turned out.

Ingredients:
  • 200g plain flour
  • 1/2 tsp salt
  • 1/2 tsp baking powder
  • 120g soya spread or dairy free alternative
  • 65g caster sugar
  • 1/2 tsp vanilla extract
  • 2 tbs orange juice (add more if mixture is too dry)
  • 200g smashed up plain chocolate
  • the zest of an unwaxed orange

1. Preheat the oven to 180c

2. In a large mixing bowl mix the flour, salt and baking powder.

3. Cream the sugar, orange juice, orange zest and melted soya spread in and add to the flour mixture. Mix it all together.

4. Form a ball of dough, roll it out onto a floured surface using a floured rolling pin. Until the dough is 1/4-1/2 an inch thick. Cut out whatever shapes you want.

5. Place on a baking tray lined with parchment paper.

6. Bake for 8-12 mins until the edges are slighly brown/

7. Leave at least 10 minutes to cool, then NOM THEM ALL!

Wednesday, 30 May 2012

My week in photos - 30/05/12

Well, these are more like from the past couple of weeks cause I've been lazy and not taken many pictures lately.


1. My brooch arrived from Gusosos! It's so pretty. I haven't worn it yet but I'm going down to birmingham for the weekend so I'll show it off while I'm there.

2. I decided I want to do some new shoes and a bag for myself. So I'm half way through painting this pair of mocassins and upcycling this vintage bag. Can you guess what it's going to be yet?

3. I'm upcycling lots of vintage bags at the mo. Keep your eyes peeled for some in the shop and a giveaway over the next month :)

4. Playing around with brogues in adobe illustrator for my new blog design. Although I keep leaving it because illustrator is so infuriating!

5. I made a vegan carrot cake for a bbq at the weekend. I was very impressed with my "cream cheese" frosting but not so much with the decoration or the texture of the cake. My recipe still needs perfecting before I put it on the blog.

6. I love lilac!! So I'm painting lots of lilac shoes for the shop right now :)

7. Playing with patterns for some material designs!

8. Nommy vegan chocolate and orange shortbread that I made today. Will post the recipe tomorrow!!

Monday, 23 April 2012

White Chocolate and Raspberry Honey Cake


I haven't baked for a couple of weeks, so yesterday I decided to try and make a white chocolate and raspberry cake for my drunken girly DVD night.

I was really pleased with how this came out. It's really sweet so i'd recommend using a fairly sour raspberry jam to even out the sweetness. I think it would even work really well with cream cheese frosting as a filling instead of the buttercream. If you want to make this with all sugar instead of honey use 325g sugar.

This is for a large cake. Half the ingredients for a smaller one.

Ingredients for the main cake:
  • 6 eggs
  • 325g self raising flour
  • 325g unsalted butter
  • 200g cane sugar
  • 100g honey
  • 1.5 teaspoons baking powder
  • 75g white chocolate, finely grated
  • Raspberries to decorate
Ingredients for the frosting and fillings:
  • Raspberry jam (preferably a sourish jam)
  • 200g white chocolate
  • 225g unsalted butter
  • 300g icing sugar
  • 100ml double cream

Method:

1. Set the oven to 180C. Grease 3 round 8 inch cake tins.
2. Sift the baking powder and self raising flour into a large mixing bowl. Add the eggs, sugar, white chocolate and honey and mix thoroughly. Heat the butter until it's soft enough to mix in with the other ingredients and mix it in.
3. Pour the mixture into 3 greased, 8inch round cake tins.
4. Bake for 20-25 mins.
5. Once cooled, trim off the top of each cake slice to make sure it's flat.
6. Sandwich a thick layer of buttercream and a generous layer of raspberry jam in between each slice and cover all over in white chocolate frosting. Decorate the top with raspberries.

For the white chocolate frosting (for the outside of the cake): Melt 200g of white chocolate with 85g butter, sift in 120g icing sugar and add 90ml double cream. Mix until even.

For the Buttercream: Thoroughly mix 140g softened butter with 10ml double cream and 280g sifted icing sugar.


Monday, 3 October 2011

Deadly Desserts


Scott Hove (the genius responsible for Cakeland) is displaying some of his new works in the Modern Eden Gallery in San Francisco starting this weekend. I am gutted this isn't in england!!!


Here's a reminder of how awesome Cakeland is! I wan't to live there!!


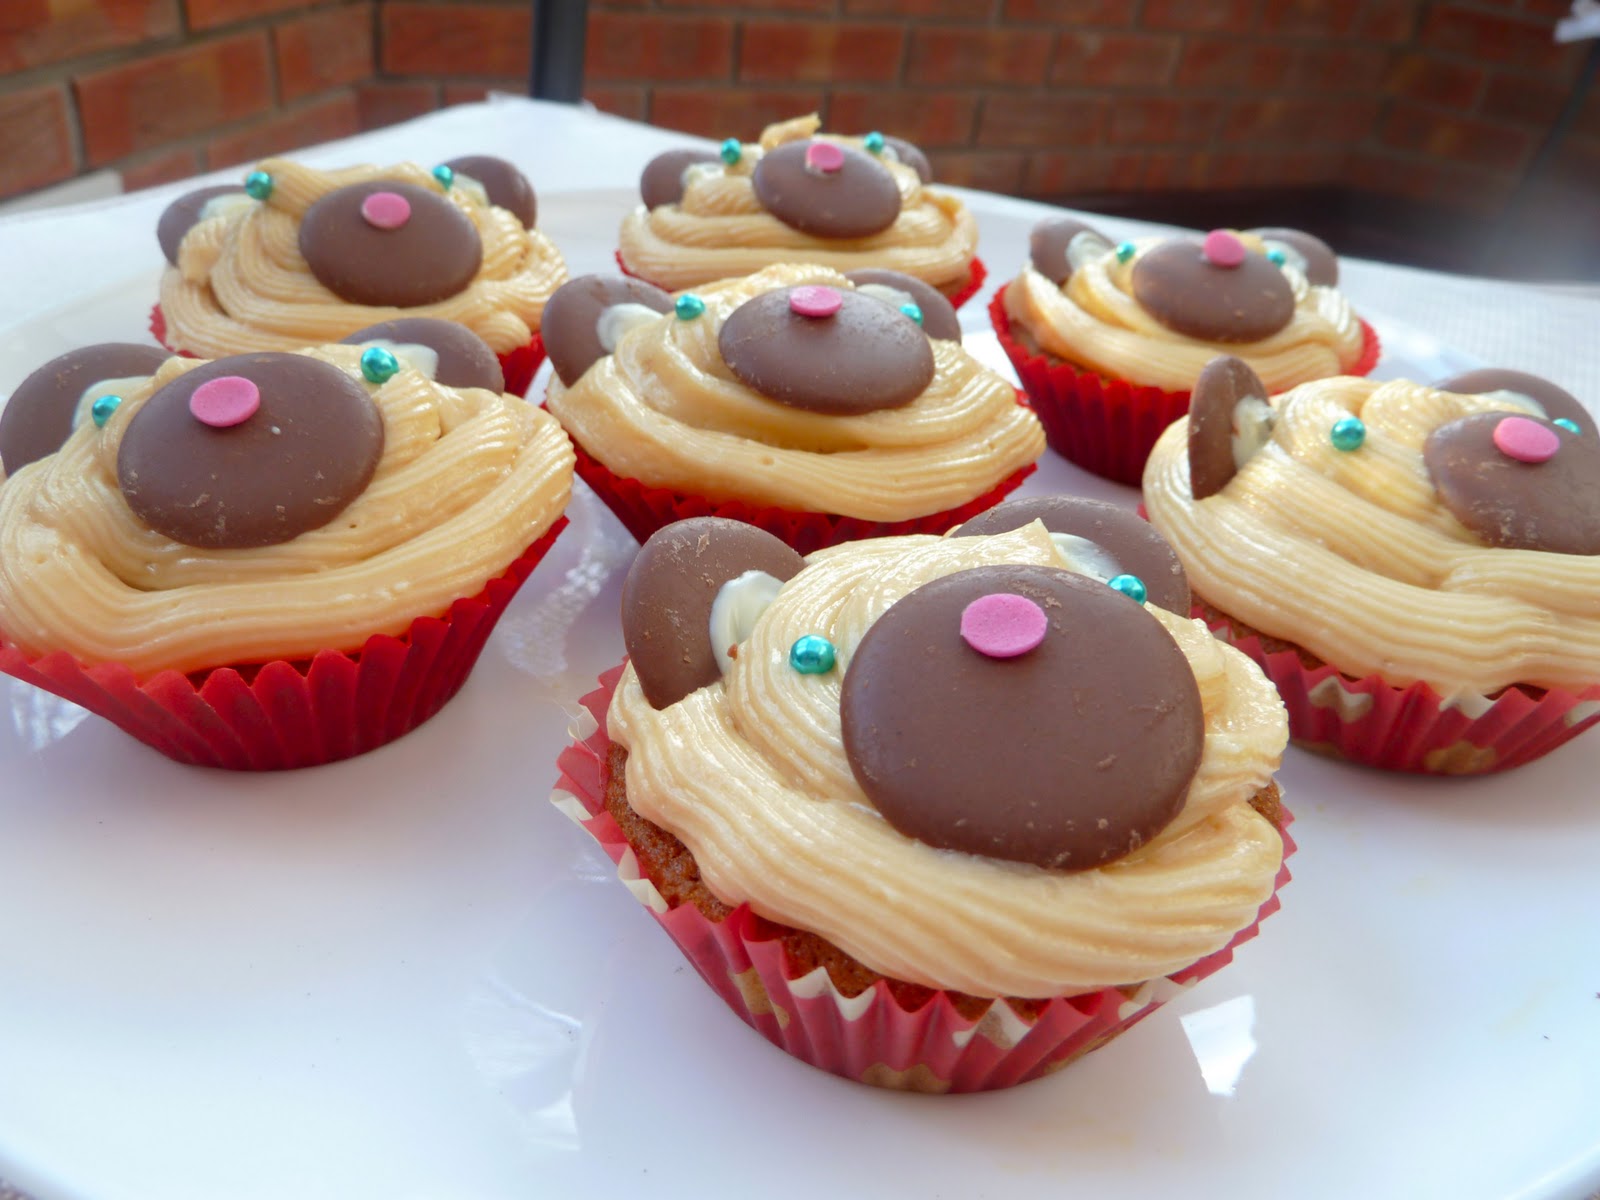
Sticky Toffee Teddy Cupcakes!!!


I've wanted to make some teddy bear themed cupcakes for a while. So when I had a day off work I got baking! Here's my recipe for sticky toffee teddy cupcakes (adapted from this recipe.) These cupcakes are light, moist and mouth watering. Seriously, they are probably my favourite cakes I've ever eaten, and I've eaten A LOT!:


Ingredients (makes 12 large cupcakes or 16 smaller ones):
For the cakes:

  • 3 medium carrots (peeled and finely grated, for a more airy cupcake use 4)
  • 1 tsp bicarbonate of soda
  • 120g unsalted butter (I like to use pure soya spread instead for a lighter cupcake)
  • 150g light muscovado sugar
  • 180g self raising flour
  • 2 medium eggs (beaten)
For the Buttercream and decorations:

  • 180g sea salted butter (just normal salted will do if you can't find this)
  • 200g icing sugar
  • 4 tablespoons dulche-de-leche or canned caramel
  • 1/2 teaspoon salt
  • Large chocolate buttons
  • Pink dotted balls/large sprinkles
  • Turquoise balls for the eyes
  • White chocolate
  • Paint Brush


Method:


  • Preheat the oven to 180 C/ 170 for fan ovens
  • Cream together softened butter and sugar in a large bowl until thoroughly mixed.
  • Sift the flour and the bicarbonate of soda in a separate bowl.
  • Add the beaten eggs to the sugar/butter mixture, add a tbsp flour while mixing. Add the rest of the flour/bicarbonate mixture and the grated carrots. Mix it all thoroughly.
  • Spoon into cupcake cases, bake for 15-20 mins, the cakes should spring back up when pressed with a finger when they are done.


For the butter cream:

  •  Soften the salted butter, mix with dulche de leche and the salt. Gradually sift in the icing sugar while stirring. 


To decorate:

  • Melt some white chocolate. Lay out the large buttons on a tray with greaseproof paper on. You will need 2 buttons for each teddy cake, 1 for the ear and 1 for the nose.
  • For the noses, paint the melted white chocolate on the back of your pink sprinkle and place in the top half/centre of your button.
  • For the ears, paint the melted white chocolate as a circle in the centre of the ear. Once the chocolate has set, cut the ears in half with a sharp knife.
  • Frost your cupcakes, add the ears, nose and eyes (unless of course you want your teddies to be blind) then SCOFF THEM. om nom nom


My dog decided I was paying FAR too much attention to baking and not enough time paying attention to her. So she spent most of my baking session posed like this expecting tummy rubs:


Poor Effy didn't even get to sample any cupcakes! :(


Monday, 26 September 2011

Droooool

I have just discovered the most amazzzing edible cake decorations from Andies Speciality Sweets. I want them ALL! I especially love their toadstools, nuts that aren't nuts and their candy buttons. I definitely need to invest in some of these before baking my next batch of cupcakes.


Saturday, 24 September 2011

Butternut squash honey cupcakes with cream cheese frosting!!

I figured because of the healthiness of the butternut squash in these cupcakes it's probably ok to overload them with yummy cream cheese frosting om nom nom nommm. I adapted my recipe from Tooth Fairy Recipes. They taste like little mini carrot cakes and are a great way to enjoy eating veg. If you're struggling to know how exactly to react when you try this cake, refer to 0.45 of this video.


Here's what you need for the basic cakes:
  • 230g butternut squash
  • 2 free range eggs
  • 100g unsalted butter, melted
  • 50g natural caster sugar 
  • 50g brown sugar
  • 80g honey
  • 100g self raising flour
  • 1/4 tsp nutmeg
  • 1/4 tsp ginger
  • 1/2 tsp cinnamon
  • 1/2 tsp baking powder
  • 1/2 tsp baking soda
  • Orange zest (optional)
For the icing:
  • 125g unsalted butter at room temperature
  • 50g icing sugar
  • 250g low fat cream cheese


Method: 
  • Preheat the oven to 200c (gas mark 6)
  • Peel the squash and cut it into chunks and place in a microwaveable bowl with boiling water. If you life your cakes a little bit more textured like carrot cake then zest a bit of the skin into the bowl too. Cook in the microwave on high power for 10 mins. Drain the excess water and mash up the squash as finely as possible.
  • Whisk the eggs and then mix them with the sugar, honey and butter.
  • In a separate mixing bowl, mix the flour with baking powder, baking soda, ginger, cinnamon and nutmeg (and orange zest if using it). Add the egg mixture and the butternut squash and mix together thoroughly. 
  • Place some cupcake liners on a cupcake tray. Fill with the mixture and bake for 20 mins (possibly less in fan ovens).
  • For the frosting mix the unsalted butter with the icing sugar until even and then add the cream cheese.
  • Wait until the cupcakes are cool to add the icing you duh brain. Add a candied orange on top if desired.


Wednesday, 21 September 2011

Aloha!

Welcome to the official PonyChops blog ltd tm. Featuring the ramblings of Ginge and Chantal, usually under the influence of co codamol and David Bowie.


We intend to keep you up to date with Fashion, Beauty, Art, Baking, Events, and more importantly our menstrual cycles (we're both due on Saturday unless Ginge starts a new packet of pills).


We also run an etsy shop: PonyChopsShop where we sell vintage clothing and will soon be expanding and selling hand painted shoes and art :) 


We both have to go because it is a school night and it is our bed time now. 


Watch this space for more periodic (menstrual) updates.